A simple way to make wine. Secrets of making homemade wine
Original post by povarruCulinary community Li.Ru - Wine
Home wine with your own hands
Homemade raisin wine
Amateur winemakers know that the basis for a drink can be not only fresh berries. And here I offer you a note on how to make homemade wine from raisins.
Homemade birch sap wine
If you are ready to plunge into the winemaking process, then be sure to pay attention to this simple, but very interesting option How to make wine from birch sap at home.
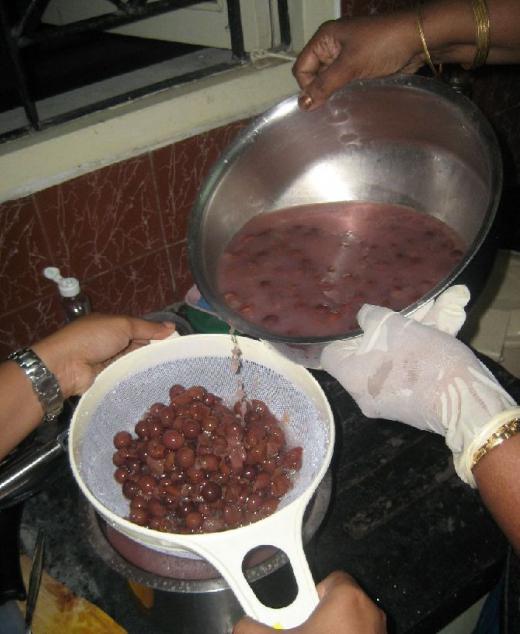
Chokeberry wine at home
Tasty wine is always good. Especially when it is prepared with your own hands. You will know for sure that everything is natural and without any factory dyes.
Red rowan wine
I offer an option on how to make wine from red rowan. A great drink for a holiday. remember, that delicious wine requires careful selection of ingredients: the berries must be ripe!
Blackcurrant wine without yeast
I offer a very simple recipe on how to make wine from... black currant without yeast. It turns out very tasty. Great to serve during the holidays any time of the year!
White wine semi-sweet
White semi-sweet wine is made from green grapes. To make the wine sweet or semi-sweet, add sugar. The more sugar, the sweeter the wine. Try it too!
Blueberry wine
Very aromatic, moderately sweet, rich and incredibly tasty homemade blueberry wine is a great idea for lovers of natural alcoholic drinks.
Wine made from honey
I suggest you see how to make wine from honey at home. Many people will like this delicious alcoholic drink, and its preparation does not require much effort!
Mulberry wine
Sloe wine without yeast
As you know, thorns have an attractive aroma and bright taste, which is why wine is made from it. There is no yeast in this recipe, which is why the wine ferments longer, but it turns out light.
Homemade currant wine without yeast
Tasty, light, rich - this is the kind of wine made from currants. If you want to treat yourself to such a drink, write down a recipe for homemade currant wine without yeast.
Wine from "Isabella"
For those who don’t know, Isabella is the name given to a grape variety that makes very tasty wine. And now I’ll tell you how to make Isabella wine at home! Delicious and bright wine!
Black rowan wine
I love making homemade wine from oranges or currants. But recently I came across a recipe for black rowan wine. I made it - delicious! Here, try it too.
Homemade sea buckthorn wine
Sea buckthorn is healthy and delicious berry, from which you can make not only jam, but also wine! I recommend to your attention a simple recipe for homemade sea buckthorn wine. Let's watch and record!
Wine with cinnamon
If you love natural, homemade alcoholic drinks, then you will be happy to experiment and try something new. I offer you an option on how to make cinnamon wine.
Orange wine
Tart and exotic taste This wine will turn your head. Making orange wine is not difficult, but the resulting drink is much tastier and much cheaper than store-bought. Try it!
Homemade berry wine
Wine can be not only grape, apple or currant. Delicious homemade wine is made from ripe and juicy chokeberry.
Homemade jam wine
Wine made from jam turns out to be more fortified than dessert, especially if the jam is old. The taste of the wine is similar to the fruits from which the jam is made.
Berry wine
Berry wine is very often prepared at home. One of the most popular is strawberry wine. The drink turns out very tasty, with a heady berry aroma. Be sure to try it!
Rowan wine
For lovers of home winemaking, I offer a very detailed and very simple recipe for chokeberry wine. Fragrant, rich and incredibly tasty, everyone will like it without exception!
Homemade plum wine
Plum wine has a wonderful aroma and a very bright, memorable taste. The wine is not designed for long-term storage, but it is prepared very quickly and, most likely, drunk in company!
Sourdough for wine
I want to tell you how to prepare sourdough for homemade wine. I make it with raisins: this makes the wine softer in taste, but still heady and aromatic. Try it, the wine turns out very interesting!
Homemade redcurrant wine
Sharing classic recipe homemade redcurrant wine. As you know, this is a sour berry, and it ferments for a long time. But if you wait until the deadline, you will get a crystal clear and tasty drink!
Homemade raspberry wine
I want to tell you how to make homemade raspberry wine. Delicate, very sweet and incredibly aromatic! This wine, of course, is a dessert wine and is drunk young. You won't get very drunk, but it will be delicious!
Sloe wine
Home winemaking is a simple and very exciting process. The basis for it can be a variety of berries and fruits. Here is one interesting option for you on how to make thorn wine.
Plum wine
If there is a bountiful plum harvest in your area this year, I think you will like this recipe for making plum wine! After all, in fact, preparing wine is no more difficult than compote, except that it takes longer!
Blackberry wine
Natural homemade berry wine is a special drink. Want to try? Then this simple blackberry wine recipe will be... excellent option. Very aromatic, rich and tasty.
Gooseberry wine
You may not know, but gooseberries make aromatic and fragrant wine. The richness of a wine directly depends on how long it will ripen. This drink will brighten up any holiday!
Apple wine without yeast
Delicious homemade wine at any time of the year is a divine drink! Let's look at the recipe for apple wine without yeast and prepare this drink together.
Apple wine without yeast
For lovers of home winemaking, I suggest taking note of the recipe as a change apple wine without yeast. Very fragrant and tasty, try it!
Wine without yeast
Wine made from currant jam
You can make homemade wine from any jam, even fermented jam. Such a drink home production It turns out not only tasty, but also strong.
Strawberry wine
Wine can be made from more than just grapes. Berry wines also take their rightful place among intoxicating drinks. I’ll tell you how to make strawberry sauce now.
Wine from raspberry jam
If you have a jar on hand home canning, you can take note of this fairly simple recipe for wine made from raspberry jam. Sweet, aromatic, very tasty, you will definitely like it.
Blueberry wine
Making wine at home is not an easy process, but how nice it is to enjoy a wonderful berry drink after all the procedures! Blueberry wine is perfect for any holiday table.
Wine from old jam
Canned food that is not eaten on time does not have to go into the trash. I offer you a simple recipe for wine from old jam. It’s not at all difficult, but the taste of homemade wine is difficult to describe in words.
Wine made from jam without yeast
If you have old berry or fruit jam, you can make wonderful homemade wine. Wine is prepared absolutely without yeast. It turns out very tasty, try it!
Hot wine (mulled wine)
In cold weather, a glass of hot wine will always warm you up!
Melon wine
I tried melon wine once in the south, when I visited people who grow melons. The taste of melon wine is original, but it is very difficult to make. And besides, you should have a lot of ripe melons!
Homemade apple wine
A recipe for making homemade apple wine for amateur winemakers and more. If you appreciate wine but want to try something a little different, this apple wine recipe is for you!
Homemade cherry wine
Have you made the jam, sealed the compotes, but still have a lot of cherries? Don't know what to do with it? Of course, wine! How to make homemade cherry wine - you will learn from this recipe.
Blackcurrant wine
Blackcurrant wine is one of the most fragrant and rich fruit wines. How to make blackcurrant wine at home - you will learn from this recipe with photos.
Currant wine
Have you ever wanted to have a magic elixir with which, even in severe frosts, summer would come again? If yes, then the recipe for making currant wine is what you need!
Apricot wine
Fresh apricots make delicious, aromatic homemade wine. To prepare it you only need apricots, water and sugar. Mix, let it ferment, infuse and enjoy! ...Let's not lose our heads!
The best thanks is to quote the entry;)
Wine made from grapes is the oldest and noblest drink. Properly prepared and consumed in certain doses, it performs healing functions, heals our body, rejuvenates, fills us with strength and energy, removes free radicals and toxins. Wine helps with bronchitis and pneumonia, tuberculosis and many other serious ailments. Therefore, it is not only possible to drink it, but it is necessary - the conclusion of doctors is clear.
Homemade wine
Naturally, it’s easier than ever to go to the store and buy a bottle of red, pink or white that you like. However, the best drink is considered to be one made with one's own hands. So we will tell you how to do it. Where does the process begin, what stages does it go through? Which varieties are best to use to produce the drink? How to make it, what container to take for fermentation and what to store it in finished product? In a word, you will learn in sufficient detail how to do it. The main thing is to follow the recommendations exactly, and everything will work out great for you!
Choosing grapes
Let us note right away: there are no special restrictions in the selection of berry varieties for the production of the drink. This means that whatever vine grows in you, harvest it from. But if you follow the advice of professionals on how to make wine from grapes, then juice from Isabella, Kapshun, Muscat, Lydia, Aligote, Buzoika, Moldova and other southern varieties is better. The main thing is that the grapes are well ripened, ripe and sweet. The bunches should be collected before frosts and rains, so that they are dry and the berries do not gain excess moisture and lose their sweetness. In addition, they can be damaged by wasps and birds. These are some simple initial recommendations on how to make wine from grapes!
Recipe No. 1 (for a small amount of grapes)

There are several technologies for preparing the drink. Much depends on the amount of raw materials and their grade. It is usually recommended to make it with additional sugar and a starter made from natural yeast. The process should begin with preparing the grapes. Carefully sort the brushes, remove debris, leaves, remove damaged elements, etc.
Ideally, it is better to pick all the berries from the bunches. But, of course, this process is labor-intensive and painstaking. Especially if you have more than ten kilograms of grapes. If you use a special press, pass the selected berries through it. Or grind using a mashed potato masher. Or you can use the famous method of the hero of the movie “The Taming of the Shrew” with Celentano in the title role and crush it with your feet, and to the music.
When the berries turn into puree, you can start making homemade wine from grapes. Recipes advise transferring the mass into a glass or enamel bowl and heating to 60 degrees (use a thermometer so as not to overheat, otherwise the wine will not taste the same). Then let the puree cool, squeeze thoroughly through cheesecloth to obtain clear juice. If it seems sour, pour in sugar syrup(100 grams of sugar per half liter of water), stir and add the starter. How to make wine from grapes next: place the container with the juice in a warm place so that the product ferments for about 2 months. Try again, add sugar if necessary, stir until completely dissolved. Pour carefully so that the sediment remains at the bottom, the finished wine into bottles, store it in a cool place. How to make wine from grapes according to the second recipe - read on.
Homemade grape wine - recipe No. 2

Sort the harvested crop, separate the berries from the branches. Place them in a deep bowl. Using a wooden or porcelain pestle, crush the fruits into a homogeneous mass. You don't have to choose the bones. How to make wine from grapes based on berry puree: sprinkle it with sugar and leave it for fermentation in a dark and cool place for a week. Cover the container with a linen rag. After the specified time has passed, strain the wine through several layers of gauze, bottle it and store it in the cellar. Serve it to meat dishes. Using this recipe, it’s good to make homemade wine from dark grape varieties.
Along the way, take note of one more piece of advice. There should be no pungent, foreign odors in the room intended for wine production: they are actively absorbed by the future drink. In general, the ideal containers for making and storing wine are oak barrels, enamel pots and buckets, and glass bottles.
Sharing secrets

Secret one: why does wine from grapes (prepared at home) taste better if you separate the berries from the branches? Firstly, in this way you can carefully sort out the raw materials, remove the berries covered with tsvilya, overripe, spoiled berries. This means that you receive a preliminary guarantee that the final product - a noble drink - will not spoil either.
Secondly, if the berries are crushed along with the twigs, the wine will be bitter and overly tart. Those. It's not nearly as high quality as you'd expect. Thirdly, how to make wine from grapes so that it turns out excellent? Prepared berries should be immediately released into juice. After all, the fermentation process begins quite quickly in picked fruits. And it is impossible for him to find the grapes intact. This should be done either with a press or manually. You can also use a juicer, but this is not the best option. For 4-5 days, let the juice stand in a warm place along with the pomace so that it “plays out” and infuses. Then strain, bottle and send for fermentation. This completes the first stage of wine preparation.
To ensure the juice ferments properly

If you don’t have oak barrels, you can ferment the drink in glass bottles with a volume of 5-10 liters. Fill them about two-thirds full. There must be free space in the vessels for the released carbon dioxide. When the bottles are filled, they need to be sealed. And to avoid air getting in, fill the edges of the plugs with sealing wax, seal them with plasticine or dough. Just be sure to make holes in them and insert flexible tubes (for example, from droppers) through which the gas will escape out. Dip the free end of the tube into a bowl or cup of water. Another option for making simple wine from grapes is to put ordinary balls on the necks of the bottles. Just don't forget to pierce them with a thick pin!
When juice turns to wine

The next - second - stage of transformation grape juice into the drink of the gods - fermentation. It takes from one and a half to 2-3 months. Containers with liquid should be placed in a cool place, such as a cellar. The temperature there should be no higher than 5 degrees. You should often monitor how actively carbon dioxide is released from the bottles. Wash the vessels where the tubes are placed periodically and change the water. If the gas comes out weakly, check the tightness of the plugs. Otherwise, air will get into the wine and it will degenerate into vinegar. Usually in home winemaking, the production of the drink begins in late September - October. Therefore, it will be completely ready for the New Year’s celebrations!
The final stage
When the wine in the bottles stops playing, becomes clean and transparent in appearance, and the sediment settles to the bottom, it can be strained again, poured into plastic bottles and drink to festive table. Its strength is about 5 degrees, according to taste qualities it corresponds to dry. However, if you like sweeter drinks, the resulting product should be “improved.” To do this, pour all or part of the wine (only without sediment) into one container. Then add 150 g of sugar for each liter of liquid (less can be done, depending on your taste). Dissolve it completely, rinse thoroughly the bottles in which the wine was previously, and pour it again, seal it and leave it to “finish playing.” The process will be completed in a month, when bubbles stop settling on the walls of the jars. The strength of the drink is 10-13 degrees. Pour into bottles, store in a cool place and drink to your health.
Homemade wine is delicious and healthy drink. It is served with hot and cold dishes or consumed exclusively as an aperitif. Invigorating taste, subtle alluring aroma, unsurpassed bouquet of organoleptic properties. Good red homemade wine removes radionuclides, stabilizes blood pressure, increases hemoglobin and neutralizes the harm that unhealthy and high-calorie foods have on the body.
Neither a social event nor a family celebration is complete without wine. The basis for an exclusive drink can be almost any berry growing in your garden: raspberries, currants, strawberries, cherries. Juicy apples, pears, plums or apricots are also an excellent base for wine must. 
Even old jam can find a second life and surprise your guests with a wonderful drink. But the crowning berry of winemaking is, of course, grapes. 
The subtleties of making wine at home
Wine is the drink of kings, so when producing it you need to pay attention to some subtleties of production:
- homemade wine does not like proximity to metal objects (bowls, buckets, spoons);
- berries and fruits must reach technical maturity - the presence of unripe or rotten fruits in the wort is extremely undesirable;
- if the fruit has insufficient sugar content, it is necessary to add sugar and water (only very sweet grape varieties do not need this);
- Strict adherence to the recipe and adherence to a comfortable temperature regime will provide your product with bright taste;
- if not used wine yeast products are used unwashed.
Even if you have no idea what the grapes that cover a country fence or house are called, if you follow all the instructions and have a little experience, it will turn out wonderful aromatic drink. Depending on the variety, the wine will have a red or pinkish tint.
Step-by-step instructions for making homemade wine
Even if you have the simplest recipe in your notebook, you will still need to tinker with it, since winemaking does not accept fuss, and making homemade wine is quite a long process and takes place in several stages:
- 1. Grapes, other berries or fruits that you decide to use as raw materials are collected in dry weather. It is advisable that there was no rain a few days before. Leaves, twigs, worms - to the left, ripe fruits - to the right. Or rather, in a clean basin or large bowl. Winemakers have different opinions about whether to separate the grapes from the clusters or not. The presence of twigs in the must can add tartness to the finished product. And who among us has not found spiders and their furry houses in ripe grape clusters? In any case, it's up to you. Experimentally, you will still come to the right conclusion. It’s easier with plums and apricots – whatever one may say, you’ll have to remove the pits. Then the contents of the basin are kneaded well with your hands or a wooden spatula, covered from flies and midges with gauze or a tight lid for 3–5 days at a temperature of 18–25 0 C. After 10–20 hours, a dense layer of pulp will begin to form on the surface, which must be mixed once twice a day.

- 2. After 4–5 days, the top cap must be removed and squeezed out well, and all the juice that has already begun to ferment (you will clearly hear the characteristic smell) must be strained twice through cotton cloth or double gauze. Add sugar at the rate of 100–200 g per liter of squeezed liquid (depending on the sugar content) and no more than 10% water if the juice is quite viscous and concentrated. It is preferable to add sugar in several doses, since its excess will significantly worsen the fermentation process. Sweet grape varieties do not need added sugar. Taste the juice and you will clearly decide whether you need more sugar or not.

- 3. Pour the prepared wort into a container of the appropriate volume: a bottle of 3, 5, 10 or 20 liters. Fill the bottle no more than 3/4 full and install the water seal. This can be a classic shutter with a sealed lid and a rubber or plastic tube immersed in a container of water. Recently, rubber medical gloves have been widely used. The neck with the glove on is additionally crimped with tape, rope or lace, and one of the “fingers” is pierced with a regular sewing needle. It looks fun, but the design pays off. Sometimes, during vigorous fermentation, foam is thrown into the water seal tube or into the glove. This usually happens when the temperature conditions for wort fermentation are not observed. After this, you have to repeat the procedure for installing the water seal: rinse the tube, replace the glove. Fermentation times depend on temperature, amount of sugar, yeast activity and usually range from 21 to 60 days. The active fermentation stage ends when carbon dioxide bubbles do not please us with a cheerful gurgle for several days, or the glove sadly hangs from the neck of the container.

- 4. When fermentation in the container stops, drain the liquid from the loose sediment that has formed at the bottom. Carefully lift the bottle to the height of a table or chair, and place the container into which the future wine is poured on the floor. The main thing here is not to shake it. Test for sugar content: if necessary, add and put under the shutter to finish playing. If it is enough, fill clean containers with the finished product and lower it into the cellar for quiet ripening. After 50–60 days, you can taste the young wine and even treat your friends to it. The aromatic drink reaches full ripening in 300–360 days. From time to time, sediment will appear, from which the wine must be drained.

Red, white, pink; grape and fruit; dry, semi-sweet and fortified. With a subtle aroma or a pronounced bouquet. Cheering the soul and invigorating the body... It's all about him, about wine. Not a single feast is complete without it; it is served with cold and hot dishes, for dessert and as an aperitif.
the site explains how you can prepare this delicious drink at home and shares small but important secrets winemaking
- Do not take spoiled berries and fruits to make wine - one moldy or rotten fruit is enough to “ruin” all your work and all the wine raw materials. Be sure to sort through grapes, cherries, currants, etc., separating what is unsuitable for winemaking.
- Wine categorically does not accept metal (with the exception of an enamel pan at the first stage of preparation), so you even need to stir it with a wooden or, in extreme cases, a plastic spoon. The same applies to the container in which the drink will “ripen”. It is best to place and age wine in glass or wooden barrels.
- Grapes and other fruits or berries that you will use for winemaking do not need to be washed. Bacteria “live” on their skins, which will play the role of natural fruit yeast. It is thanks to them that the fermentation process begins.
- All stages of winemaking must be carefully controlled and the recipe followed exactly, otherwise the result will not be wine, but bad vinegar. In addition, winemakers recommend scrupulously monitoring the temperature at which the drink is prepared - the fermentation process will not begin in a cool room.
- Without adding water or sugar, wine is made only from very sweet and juicy grape varieties. For all other berries and fruits, adding additional liquid and granulated sugar is necessary, otherwise fermentation will not proceed.
Homemade wine recipes
Red semi-dry wine from grapes
In order to make wine at home, you will have to tinker, but if you follow the technology, you will get a natural aromatic drink with a beautiful rich color.
Ingredients (for 3 liters of finished wine):
- Dark grapes – 5 kg,
- Sugar – 1.5 kg.
Preparation:
Sort the grapes, separating them from the branches and removing spoiled and bruised berries. Crush the grapes in portions with your hands in any non-metallic container, pour the juice into an enamel pan, and place the pulp in a glass or wooden container with a wide neck.
Heat the grape juice slightly and dissolve 750 g of sugar in it, pour the resulting syrup over the squeezed berries. Cover with gauze and place in a dark, warm (21-23 degrees) place for 5 days. Twice a day, morning and evening, mix everything with a wooden spoon with a long handle.
After the designated period, strain the grape must through cheesecloth and a plastic colander into a clean jar, squeeze out the pulp and pour the released juice into the same container. Add the remaining 750 grams of sugar and stir.
Place the jar of wine under the water seal - make a hole in the plastic lid and pass a plastic or special rubber tube through it: lower one end into the grape must, the other into a container with water. The tube must be tightly connected to the jar so that no air gets into the wine. To do this, you can use regular stationery tape.
Place the structure in a place that is not very lit, maintaining the same temperature (about 22 degrees). Leave for 21 days. If, after this period, bubbles continue to appear in the jar, keep the wine until they completely disappear.
After this, filter the wine, carefully pour it into another container so as not to disturb the sediment formed at the bottom, and carefully seal it. Let stand for another month, this time in a cool place. During this time, pour the wine into a clean jar three times (once every 10 days), again avoiding any sediment.
Then put the wine in the refrigerator or basement for at least another 30 days. In general, the longer this drink is infused, the tastier it becomes.
Recipe option: the grape pomace remaining after preparing the must can be used again. Dilute in 2.5 liters of warm boiled water 1 kg of sugar and pour grape marc with this syrup. Then repeat the process as for the first batch of wine. This drink will turn out a little weaker, but will still be tasty.
How to make homemade wine: tips and recipes
Recommendations: the water seal can (but is not advisable) be replaced with an ordinary thin rubber glove, in which a small hole is pierced in the middle finger. In this case, pull the glove over the can and carefully secure it with an elastic band or tape.
Also, keep an eye on the fermentation process. If nothing happens within three to four days after installing the water seal or glove, that is, if no bubbles appear in the jar (or the glove does not inflate), then you need to move the container with wine to a warmer place.
Cherry wine
Cherry wine is rich, slightly viscous, with a pronounced taste. It goes well with many cheeses and biscuits, so it is good to serve with dessert.
How to make homemade wine: tips and recipes
Ingredients (for three liter jar):
- Cherry – 2 kg,
- Sugar – 500 g,
- Water – 750 ml.
Preparation:
Sort through, but do not wash. Pour it into a jar and mash it with a wooden masher, cover the container with a cotton cloth. Soak for 4 days at a temperature of 23-24 degrees. Stir three times a day. On the fifth day, squeeze the juice from the berries through cheesecloth into another jar and add 310 grams of sugar dissolved in 750 ml warm water. Mix and place under a water seal.
After 4 days, pour some wine through the stopper tube, stir 70 grams of sugar in it and pour it back into the jar. Reinstall the water seal. Repeat this procedure on the 7th and 10th days, adding 60 g of granulated sugar each time.
After the fermentation process is complete (after bubbles stop appearing in the jar), keep the wine under the seal for another 3 weeks. Then pour into glass bottles, carefully cork and put in a cool place, placing in an upright position. A month later the wine is ready.
The intense rhythm of life and stress force us to look for spiritual activities to relieve internal tension and relax. Such a hobby could be making wine at home, learning all the intricacies of winemaking and homemade wine options from various berries and fruits. Alcoholic drinks from grapes, raspberries, cherries, mulberries, currants and many other berries will delight you with their aroma and enchanting aftertaste.
Making wine at home is a process that includes several stages, after mastering which you will certainly become a master of winemaking. Your hobby will not take up a lot of your time, but it will require patience, observation and the desire to make magical nectar for the gods.
Wine grape varieties, fruits, and berries are suitable for making wine. There are wines of various strengths and types, such as fortified, strong, dry, sweet, semi-dry and semi-sweet, varietal or blended.
Step-by-step preparation of wine at home
Stage I: preparation of wine yeast
To make delicious homemade wine, you need to prepare a wine starter, the so-called yeast, in advance, a week or a week and a half before harvesting or purchasing raw materials. Yeast microscopic organisms live in colonies on the outer parts of berries and fruits. There are especially many of them on grapes.
How to prepare wine yeast
Recipe No. 1
Grind a half-liter container of unwashed raspberries in a ceramic mortar (can be replaced with strawberries, cherries or currants), pour them into glass jar 1 liter capacity, add half a glass of sugar and a glass of water.
Close the jar tightly with a lid and carefully shake its contents to thoroughly mix and dissolve the sugar. Pour into a dark bottle, cover with several layers of gauze and secure with an elastic band.
We place the bottle for 4-5 days in a dark and warm (25-27 degrees) place for the growth of lactic acid bacteria. After the allotted time, we filter the fermented mass through cheesecloth and obtain a high-quality wine starter.
Recipe No. 2
Pour grated raspberries (2 cups) into a liter jar, add half a glass of water, a couple of teaspoons of sugar and the same amount of vodka or alcohol (we buy at the pharmacy). Alcohol can be replaced with vodka - 6 tsp.
Shake and pour a few drops of ammonia into the mixture. We put the jar in a dark place with room temperature and try to shake the mixture every day. Wine yeast is ready in 3-4 days.
The starter must be used no later than 10 days from the date of its preparation. During this time, the yeast will settle to the bottom of the bottle, and therefore it should be taken into account that its concentration at the bottom of the bottle is much higher than under the neck.
For the so-called “cracker” we use the following proportions:
- 200 g wine yeast: 100 g sediment: 10 l juice.
To make dessert wine:
- 300 g: 10 liters of juice.
Stage II: preparation of raw materials
Only ripe fruits and berries are suitable for wine. Overripe fruits lead to rapid vinegar souring, and in unripe ones, excess acid will prevent you from getting a high-quality drink. The raw materials must be sorted out, rotten and moldy specimens must be removed without regret, otherwise even a few berries can destroy the entire volume of wine material. As you understand, bacteria that are undesirable for wine material live in such berries.

Berries and fruits should be collected on dry, rainless days. They do not need to be washed (microorganisms live on their surface), but put into use immediately. If the fruits have large seeds, they must first be removed, otherwise the almond bitterness and unusual smell will be transferred to the wine.
Stage III: grinding raw materials or obtaining pulp
This is very important stage making wine at home! Usually the berries are crushed, and this applies not only to grapes. To do this, use a press, a meat grinder with a large grid and special graters.

All parts of the devices must be made of stainless steel, wood or coated with ceramics. Wine raw materials have high acidity and on low-quality material it quickly oxidizes, which leads to a slowdown in the fermentation process, foreign tastes and odors of the final product.
It should also be noted that it is unacceptable to grind berries or fruits into puree. We get a minimum amount of juice from the puree.
Stage IV: fermentation and extraction of pulp
As microorganisms work, the raw materials you use for wine impart color and aromatic substances to the juice. Therefore, homemade wine made from ground berries and fruits is much tastier, has an intense color and aroma, when compared with a drink made from pure juice.
How to make homemade wine with pulp?
We pour the crushed raw materials into a glass container (or an oak barrel) with a container suitable for the entire amount of pulp. Add prepared wine yeast in the above proportion and purified water heated to 25 degrees - at the rate of 0.25 liters of water per 1 kg of pulp. Those. pour 1.25 liters of water into 5 kg of pulp. The fermentation container should be filled to 2/3 of its volume, no more. You can also distribute all the raw materials into 3-liter jars.
We cover the neck of the bottle with gauze in several layers and place it in a room with a temperature of 20-22 degrees for fermentation, which becomes visible the very next day. Fermentation is accompanied by the appearance of a foamy cap on the surface of the pulp, which we mix with the rest of the mass a couple of times a day, releasing carbon dioxide.
It is necessary to stir, otherwise the whole mass may turn sour and you will not get wine, but homemade vinegar. After about a week, the pulp can already be strained, or rather, squeezed out. 10 kg of pulp yields approximately 5-6 liters of natural juice.
The first pressing guarantees the best quality of wine material, elite, one might say. By adding water to the pulp after the first extraction and squeezing the juice again, we get a table variety of the drink. The technology for making berry or fruit wine at home involves mixing all the pressed products with pulp in one container (the first and subsequent pressings). We will consider this stage below.

Stage V: wort preparation
This stage answers the question of how to place the must to obtain high-quality homemade wine. The must is the basis of the wine, and therefore it must have the correct parameters.
Natural wort, as a rule, has high acidity and low sugar content. Only grapes and some fruits (apples, pears of some varieties) have good performance. The remaining berries produce juice with a high content of tartaric acid and low sugar, and therefore require dilution with water and the addition of sugar.
We use soft, filtered, odorless and neutral water for the wort. Sugar must first be dissolved; it is advisable to boil the syrup, pouring it into the wort when it has cooled.
All proportions of water and sugar depend on the fruits and berries from which you make wine. The more acidic the juice, the more water and sugar you need to add. We have summarized the basic proportions of sugar and water in a table:
| Juice – 1 l | Quantity of water, ml | Quantity of sugar, g | Fortress, vol. |
| Apple | 100 | 240 | 14-15 |
| Crimson | 500 | 370 | 16-18 |
| Cherry | 500 | 350 | 15-16 |
| Bilberry | 200 | 300 | 14-15 |
| A mixture of black and red currants | 1100 | 530 | 13-15 |
| Gooseberry | 200 | 250 | 14-15 |
- 20 g of sugar in 1 liter of wort without water increases alcohol by 1%.
Those. If you add 180 g of sugar to a liter of wort, then the estimated strength of the wine will be 18 vol. After analyzing the plate, you can already vary the water and sugar content for different juices. Also be sure to keep in mind that adding sugar to water increases its volume in the following proportion: 60 g of sugar in 60 ml of water gives 70 ml of syrup. Accordingly, our wort volume will increase.
Experienced winemakers advise sticking to approximately the following proportions:
- 3 kg of berries – 3 liters of water. Total – 6 kg. Then you need exactly a third of sugar. Those. Divide 6 kg by 3 and get 2 kg of sugar.
This calculation is, of course, easier to carry out, but it is very approximate. When you create your own homemade wine recipe, you will have your own proportions to suit your individual taste preferences.
Stage VI: fermentation of the wine must and its further clarification
So, having prepared the wort and poured the workpiece into the prepared container to two-thirds of its capacity, we need to build a water seal so that the resulting carbon dioxide leaves the container with the wort, and fresh oxygen does not enter. To do this, the bottle must be securely sealed with a cork or any other lid, and a hole must be made in its center into which a thin tube must be inserted to remove gas.

Usually, a glass from a pharmaceutical pipette is inserted into the lid of the container and a plastic or rubber tube is put on it (can be replaced with a thin cambric, which is sold in hardware stores). This tube should be lowered into any container of water.
Place the container with the prepared wort in a dark place (not completely dark, but without direct sunlight) with a room temperature of 20-22 degrees for about 20-25 days. For convenience, we place it not on the floor, but on a stable stool or stand, so that later it will be convenient to “skim the wine from the sediment.”
During the fermentation process, sugar turns into alcohol, releasing carbon dioxide, which escapes through the tube you provided with the bottle of wort. The fermentation process gradually slows down, which can be observed by the activity of air bubbles in a jar of water.
Over the next 2-3 weeks, the fermented wine material should lighten. During this period, the yeast gradually dies, sinking to the bottom of the bottle, taking with it all the solid particles in the wort. When this stage is completely over, we will need to separate this sediment from the settled product. This process is called “removing the wine from the lees.”
Stage VII: removing the wine from the lees
This stage is one of the most important. If you overexpose wine material with dead yeast fungi, they will give it an unpleasant odor and bitter taste. Therefore, we must carefully drain the settled wine using a rubber or plastic tube with a diameter of about 1 cm.
Carefully, so as not to shake the bottle in any way (otherwise the sediment will easily rise and cloud our precious nectar), open it and lower the tube into the liquid, lowering its end at least 2-3 cm above the level of the sediment. Using the free end of the tube, we perform a short suction of air and direct a stream of clarified wine into the prepared clean dishes.

Stage VIII: bottling and storage of homemade wine
So we got dry wine by preparing it at home. It is better to store it in dark glass bottles (the ideal option is a factory bottle of sparkling wine - champagne), close it with corks and place it in a horizontal position.
Store in a cool, dark place. We try not to shake them or move them from place to place, since light fermentation may still occur for several weeks. The drink will be fully suitable for serving after 60 days.

If you don’t like dry wines, you can add sugar when pouring into a container, but it is better to sweeten the finished product, since homemade wine does not store well with sugar.
If you want to store sweet and dessert wines, then add sugar to the filtered starter drink, dissolving it. After that, filter again. Pour into glass containers (preferably 0.7 l bottles) and place them horizontally, store at a temperature not exceeding 10 °C, i.e. in a cold cellar. Under other conditions, the wine may begin to ferment and turn sour.
Making different types of homemade wine
By varying the content of sugar and alcohol in dry homemade wine, we can make a drink for every taste and type:

As you can see, making wine at home is not at all difficult. And although this process is long, it is also very interesting and exciting. This could very well become your hobby, which benefits both your health and your wallet. By developing your intuition and winemaking skills, in just a few years you will become a recognized master, which is what we sincerely wish for you!


